Monday 24 December 2012

Little bit of magic for Christmas... or New Years Eve!

I tasted this cake at the time when I was working at the French Patisserie and I fall in love with it. Now when I was looking for something to bake for Christmas I accidentally came across this blog with the recipe! As I was reading I realized that the blog author has experienced the same: first watched it being made on the TV and then later found the recipe in the magazine. I sure agree with Bree that this cake is magical not only because of the taste, but also because of the baking process. You see... the cake base floats up and exchanges with the flan without any mixing! Try it for yourself... it might be too late for Christmas, but there is always time for your New Year's party ;)


CHOCOLATE FLAN CAKE

For the cake:

  • 120g caramel/toffee sauce
  • 75g cup flour
  • 40g cocoa powder
  • 1/2 tsp baking soda
  • 1/4 tsp salt
  • 110g bittersweet chocolate, chopped
  • 85g butter, melted
  • 120ml buttermilk
  • 110g sugar
  • 2 eggs
  • 1 tsp vanilla essence
For the flan:
  • 2 (395g) cans sweetened condensed milk
  • 600 ml whole milk
  • 175g cream cheese
  • 6 eggs
  • 4 egg yolks
  • 1 tsp vanilla
  1. Preheat the oven to 180°C. Spray a Bundt cake tin with baking spray. Pour caramel/toffee sauce into the bottom of cake pan.
  2. In a medium bowl, combine flour, cocoa, baking soda, and salt. Set aside. Place chocolate and butter in a microwave safe bowl, heat until melted, 2 minutes at 50% power. Whisk buttermilk, sugar, eggs, and vanilla into chocolate until incorporated. Add flour mixture and stir until combined. Pour batter over caramel.
  3. Add sweetened condensed milk. milk, cream cheese, eggs, egg yolk, and vanilla to a blender, Blend for one minute, or until very smooth. Slowly pour over cake batter.
  4. Place the cake pan in a large roasting pan. Pour boiling water halfway up the sides of the pan and bake for 75 to 90 minutes, or when a toothpick comes out clean. Transfer to a wire rack and cool to room temperature, about 2 hours. Transfer to refrigerator and chill for at least 8 hours.
  5. To unmold, place the bottom of the cake pan in hot water for 1 minute. Place a cake plate over the cake pan and flip over. Slowly remove pan and serve.
  6. Visit BakedBree for the instructions in pictures.

Gingerbread cookies for snowy weather :)


I am finally almost there! My presents are almost packed, a lot of my knitting projects are over, my baking is coming to the end and the most importantly I am here in Lithuania watching the snow falling down :) (sorry I needed to brag).

Anyway... as I am waiting for Christmas Eve to come I remembered about last years' Christmass and the lovely gift that I received from Liz. That was a little folder with all the American recipes including the gingerbread cookies recipe of course. I baked so many this year!

GINGERBREAD COOKIES

Ingredients:  490g flour
                     1/4 tsp salt
                     1/2 tsp baking soda
                     1/4 tsp ground cloves (I used all spice mix instead)
                     2 tsp ground ginger
                     1 tsp ground cinnamon
                     230g butter, softened to room temp
                     130 brown sugar
                     1 egg
                     90g treacle (if you can't find it you can substitute with more brown sugar)

Whisk together first 6 ingredients and set aside. In a separate bowl cream butter and sugar with a mixer. Add egg and molasses (or more brown sugar); beat on medium until mixture is smooth. Add the flour/spice mixture slowly, blend on low until just combined. Wrap in plastic and chill for an hour. Preheat oven to 165C. Roll out and cut cookies. Place 1/2 an inch apart on an ungreased pan. Bake for 9-11 minutes (be careful not to brown them as that means they are burning). Wait until they are cool and decorate with frosting if desired

Tuesday 4 December 2012

Are you feeling Christmasy yet?

I love Christmas! Everything about it! I especially love baking and decorating. Have you done your Christmas decorating yet? I am sure you did! I have seen so many of my friends on Facebook putting all these wonderful pics of their homes which kind of put me under pressure. Because me as always never on time with this. And this is not because I have lack of inspiration, this is because I always run out of time. So here we go, I finally unloaded what was in my head already all made (including baking) and ready to go....


I even knitted this bird shape hanging decoration and if you remember last year's post on Christmas decoration this is exactly the pattern I used.
This bird decoration is not only for Christmass (it is for keeps ;). The knitting pattern for it is coming soon!

Happy Christmas waiting!

Tuesday 13 November 2012

After "Canvas"


Just wanted to say that I really pleased with the event (I really enjoyed being there and watching the performances). I would also like to say special thanks to Jacquie who helped me with the cupcake display and to Lola, who transported all those cupcakes to the venue :-)

Friday 26 October 2012

"Canvas"


This whole week I have been baking... Cupcakes! Lots of them, all types! You see am participating (with baking) in this arts event where artist of all kind will be showcasing their work. I am obviously inviting you if you are able to attend in such a short notice and if you are interested to see my new cupcake collection :-). For more info go here "CANVAS"

But... if you are not able to make it, I am not going to be upset with you :-(. Instead I am giving away my favorite cupcake recipe here which I like because this recipe makes beautiful cupcakes even though if they are quite modest without the icing ;-)....

APPLE CINNAMON CUPCAKES
(makes 15)

Ingredients: 3 eggs
                    200g brown sugar
                    200g yogurt
                    50g butter
                    200g flour
                    1½ tsp baking powder
                    50g oats
                    1 tsp cinnamon
                    2½ cooking apples
                    
1. Preheat the oven to 180C and line muffin tin with baking cases
2. Beat the eggs lightly with sugar. Mix in yogurt and melted butter.
3. Sift the flour with the baking powder then mix it with the oats and cinnamon. Mix dry ingredients with butter and yogurt mixture. 
4. Peal two apples and shred them. One half of the apple prepare for decoration by slicing it into really slim trips (I used slicer for that). Mix the shredded  apples into the cupcake mixture.
5. Use spoon to fill the baking cases with mixture, about two-thirds full. Arrange apple strips on top. Bake the cakes for about 25-30min.
 

Wednesday 10 October 2012

My trip to Italy

I will start with the official news that I am back to London and the fact that I am experiencing mild writer's block condition (not that I consider myself a writer). So beware of this minor problem as I progress with writing my quick story. Also would like to mention that I no longer work in the cafe... who knows what the future will bring? But for now am focusing on settling in London whilst still feeling really privileged for my year experiences in Windsor.

Anyway... moving on! I had a short gap between moving to London and leaving the cafe job so I did little bit of traveling. I visited Italy, Greece and Lithuania (of course!). What I am going to talk about now however is Italy since it is what the title is suggesting. And since I am only telling short story I will only focus on FOOD. And believe me food was the biggest part of this trip! At least in my opinion...
 And the most amazing thing is that we were staying at our friend's Alex house! You see, I was able to witness the real Italian cuisine. Thanks to Alex's mum as she was really wonderful hostess and cooked three course meal every time. She even showed me how to make gnocchi which is my favorite! I mean, I knew how to make these potato dumplings before, however that used to take me forever. This time I defiantly feel more confident as Alex's mum (sadly forgot her name) demonstrated a good technique how to make them quicker. I am also amazed that her recipe had some ricotta cheese which made gnocchi even more soft and tasty! Try it for yourself....
 GNOCCHI WITH PEAS AND PROSCIUTTO HAM

Ingredients (feeds 4 gnocchi lovers):  300g ricotta cheese
                                                             2 egg yolks
                                                             250g potatoes (boiled, pealed and mashed)
                                                             130g flour plus some for rolling
                                                             100g hard cheese like Parmesan  
                                                             1tbs butter
                                                             1 leek
                                                             200g sweet peas (can be from frozen)
                                                             250ml vegetable stock
                                                             4tbsp cream
                                                             4 slices prosciutto ham
                                                             olive oil
                                                             salt and pepper

1. First, make the dough by mixing ricotta cheese, egg yolks, potatoes, flour and Parmesan together.
2. Then, prepare the sauce. Chop the leeks and fry them with butter. Then add peas, stock and whiz it up all together with hand food processor. Let it cook for further 2-3min and after taking it of the heat add the cream and season to your taste. Set aside.
3. Make the gnocchi by rolling the pieces of dough on the floury surface and then cutting them into little pieces (see picture above). To make them textured roll each gnocchi piece against the fork ribs. Lay them in floured plate by leaving some small gaps between them as they really like to stick together.
4. Lay prosciutto ham slices onto foil and bake for around 15 min until it is slightly golden. Take it out to dry.
5. Cook gnocchi in lightly salted boiling water. But don't go away too far away as the little pieces of gnocchi soon rises up to the top and that's when you should fish them out.
6. To serve mix gnocchi with sauce, little olive oil and dish them up. On top of each plate add crispy prosciutto slice and maybe some Parmesan of course. Buon appetitio!


Tuesday 18 September 2012

My 30th birthday dinner party


Yesterday I have celebrated my memorable 30th birthday with a dinner party. So since my blog has had really really long holidays I thought this was a good occasion for it to come back to "work". 

Anyway... for my party success I am giving a big credit to my friends Joana and Lina who were my loyal slaves all day long and a little bit to myself (I did set up this wonderfully harmonious menu after all). I would also like to grant a massive credit to the "BBC Good Food" website (not that they care), but the recipes there are always tested and the food always comes out like they say it would. Really recommend it for anybody.  Here is one recipe for the cake I made. Practically copied it and pasted it as I did not need to change anything (except the deco since fresh cherries were out of season here in Lithuania). Enjoy!


BLACK FOREST GATEAU

Ingredients:  175g salted butter , plus extra for greasing
                     200g bar dark chocolate
                     300g plain flour
                     375g golden caster sugar
                     25g cocoa
                     1 tsp bicarbonate of soda
                     2 medium eggs
                     200g buttermilk or natural yoghurt
                     425g can pitted cherries, 2 tbsp juice reserved, rest drained
                     100g morello cherry jam
                     4 tbsp kirsch(or more juice from a can if you want it to be non-alcoholic)
                     500ml tub double cream
                     3 tbsp icing sugar1 small punnet fresh berries (optional)
  1. Heat oven to 180C/160C fan/gas 4. Grease and line the base of 3 x 20cm cake tins. Boil the kettle. Put the butter and 75g chocolate broken into chunks in a small pan and gently heat, stirring, until completely melted.
  2. Mix together the flour, sugar, cocoa and bicarbonate of soda with a pinch of salt in a mixing bowl. Whisk the eggs and buttermilk or yogurt together. Scrape the melted chocolate mixture and egg mixture into the dry ingredients, add 100ml boiling water and whizz briefly with an electric whisk until the cake batter is lump free.
  3. Divide the mixture between the tins and bake for 25 mins, swapping the tins round after 20 mins if they're on different shelves. To test they're done, push in a skewer and check that it comes out clean.
  4. Prick the cakes a few times with a skewer. Mix together the 2 tbsp reserved cherry juice and the kirsch (or more juice) and drizzle over the cakes. Cool the cakes.
  5. Mix together the remaining drained cherries and jam. Tip 200ml of the cream into a small pan and heat until just below simmering point. Chop the remaining chocolate and put in a heatproof bowl, pour over the hot cream and stir until melted. Set aside until spreadable.
  6. When the cakes are cool whisk the remaining cream and the icing sugar together until softly whipped. Spread over two of the cakes, then spoon over the jammy cherries. Stack the cakes together. Spread the chocolate cream over the third cake and sit on top of the other cakes. Pile the fresh berries in and around the cake and serve. I added black current leaves to make it look slightly wild, but this is totally optional!

Thursday 24 May 2012

Summer frangipane

My friend Suzanne went away for a week so she gave me the keys to her house and offered me to use her oven (my oven is still broken). How generous is that! Anyway, I wanted to bake something with the ingredients I had so I started digging around my kitchen. I found frozen sweet pastry (that I made from scratch) in the freezer so my first fought was "tart!!". But later on, after finding ground almonds in my cupboard I made a decision on frangipane (which is a tart technically, but I like the frangipane name better)! So today on my way to my friend's house I bought some strawberries and here it comes the result :)

STRAWBERRY FRANGIPANE

For the sweet pastry:
  • 500g plain flour
  • 250g unsalted butter
  • 125g caster sugar
  • 1 egg

For the cream:

  • 150g unsalted butter
  • 150g caster sugar
  • 3 eggs
  • 150g ground almonds
  • 50g plain flour
  • 1/2 pod of vanilla seeds (optional)
  • 250g strawberries

For the glaze:

  • 2 tbsp apricot or seedless raspberry jam
  1. Place the butter and sugar in mixing bowl and beat them together until they are light and fluffy. Add the egg to the butter mixture and mix it until combined. Then add the flour gradually and mix until it looks like smooth dough.
  2. Place the pastry in the refrigerator for 30-60 minutes to rest. (or into freezer if you want it to be used another time)
  3. Meanwhile make the cream. Place the butter and sugar together in a mixing bowl and mix them together until they are creamy and light. Mix the eggs in 1 at a time until well combined. Sift the flour and ground almonds together. Slowly add the almond and flour mixture to the butter mixture. Mix the ingredients together until you have a creamy mixture. Set the frangipane cream aside until ready to use.
  4. Remove the pastry from the fridge. Roll it out on a well floured surface until it is around .5-.75mm thick. Lightly grease 30cm tart tin (or line it with baking paper). Line the tart tin with the pastry. Place the lined tin in the freezer for 15 minutes or in the fridge for 30 minutes to rest.
  5. Preheat the oven to 200°C. Blind bake the pastry for 10 minutes until just firm and without colour. Remove the pastry from the oven an allow it to cool.
  6. Reduce the temperature to 180°C. Place the frangipane cream in the tart tin and spread it out evenly with a palate knife (do not over fill).
  7. Place the strawberies in the frangipane so that they are spread out over the tart.
  8. Place the tart in the preheated oven and cook it for 30-40 minutes. The frangipane cream will be golden brown, risen and firm when the tart is ready.
  9. Remove the tart from the oven and allow it to cool for 10 minutes. Remove the tart carefully from the tin.
  10. Place the apricot or raspberry jam in a small saucepan and place it over a moderate heat. Heat it while stirring until it has melted. Remove it form the heat and brush it over the tart lightly with a pastry brush.

Monday 30 April 2012

No Coments...

My oven is still broken so here is another no bake desert that I made out of desperation: the chocolate mousse dessert.... I think you have to find it for yourself and actually taste to appreciate. So, NO COMMENTS FROM ME...

COCONUT AND MIXED BERRIES CHOCOLATE MOUSSE

 Ingredients:  200g dark chocolate
                      4 tbsp double cream
                      2 tbsp coconut flavored rum (something like "Malibu")
                      3 eggs
                      4 tbsp sugar
 For serving:  4 tbsp desiccated coconut
                      2 handfuls of mixed berries (like blueberries or raspberries etc... the more the better!)
                      200ml double cream

1. Melt the chocolate and mix it with double cream.
2. Separate egg yolks from whites (reserve the whites in separate bowl). Add sugar to the egg yolks and whisk it until it becomes pale. Gradually add it to melted chocolate mixture.
3. Whisk the egg whites until it forms stiff peaks. Add it gradually into the chocolate mixture by folding and don't overwork it as it would let all the air out!
4. The mixture then is ready to split into 4-6 glasses (I used cups as I thought that looks really cute!). Cover them with cling film and place them into the fridge for at least two hours.
5. Decorate the deserts with whisked double cream, desiccated coconut and mixed berries.

The rest is up to you....

Tuesday 24 April 2012

Broken oven??? :'-(

The past couple of weeks I have been a little bit upset as the oven in my house is broken... which means no baking :-(. But this did not stop me from eating deserts... You see, I have been experimenting with no-bake cheesecake, which I tried to fit into little cups. Why? because I think the smaller the cuter! So there you go my best version so far...

CUP-CHEESECAKE
(makes 12)

Ingredients:   200g (14) Bourbons (chocolate biscuits)
                      75g (1/3 cup) unsalted butter
                      200g (7oz) soft cheese (something like Philadelphia)
                      300ml (1¼ cup) sweetened condensed milk
                      250g (9oz) cream fraiche (soured cream) 
                      1tbsp lemon juice
                      10g (4 sheets) gelatine, soaked in cold water
                      36 raspberries (3 per cup) 
                      50g chocolate (optional)

1. Break up the Bourbons into food processor then crush them up. Stir in the butter. Use crumbs to line the base of 12 cupcake cases.
2. Blend the soft cheese with condensed milk and cream fraiche.
3. Heat the lemon juice in a pan. Squeeze water from the gelatine leaves and stir into the juice. Strain trough a sieve over the cheesecake mixture and continue mixing until well combined. Pour the filling into the 12 cups over the base.
4. Drop tree raspberries into each cup and place the whole cupcake pan into the fridge to set for approximately two hours.
 5. Meanwhile melt the chocolate and pour it into the piping bag. On the parchment paper pipe whatever shape you want to decorate your cup-cheesecakes (I tried to create little hearts, but it could be anything).
6. Place the tray with the chocolate decoration into the freezer for 15min and then they are ready for the job.
7. This is the end job to enjoy... yum!


Friday 6 April 2012

What Pinterest told me to bake for the Easter?

I recently fell in love with Pinterest. They say this social website is going to be the next Facebook! I totally agree, however my friend disagree as she is a hardcore Facebook-er. But I bet when Pinterest becomes more popular she will convert. Anyway, the cool think about Pinterest is that is so visual as people "pin" their crafty decor ideas, fashion and of course deliciously looking bakes in picture form.... so when I was looking for Easter ideas, I "repinned" on my profile these speckled Easter eggs...
then these Easter eggs that have been dyed with natural dyes like beetroot juice, blueberries and orange peel (this reminds me of Lithuanian traditions when we dye our Easter eggs with onion peeling)....
and this egg-pot idea, which is not only for Easter...


These Cadbury cream cookie cups have been pinned by Katrina (http://www.inkatrinaskitchen.com/2012/03/cadbury-cream-cookie-cups.html) , but I edited the recipe slightly. I don't know about you, but I find the cadbury eggs a little bit sickly... however these cups taste heavenly....
I tried to make it as natural as I can so I used agave nectar in the cream. Accidentally I used agave nectar that have been flavored with honey. So my chocolate cookie have been flavored with honey which tasted yummm.... however I don't know if this is to everyone taste.

CADBURY CREAM COOKIE CUPS
(makes 12)

Ingredients: 125g (1/2 cup) unsalted butter
                    125g (3/4 cup) light brown sugar
                    1 egg (beaten)
                    200g (1 3/4 cups) flour
                    1 tsp baking powder
                    1/2 tsp salt
                    2 tbsp coco powder
                    50g flaked chocolate bar (I used milk chocolate)
                    50g chopped nuts (I did it with coconut flakes since I had none in my cupboard)
                    (for the cream)
                    25g (6 tsp) unsalted butter
                    85g (1/4 cup) honey flavored agave nectar or runny honey
                    260g (2 cups) icing sugar
                    2 tbsp water
                    yellow food colouring                
1. Cream butter with soft brown sugar, then add egg and combine well.
2. Add flour, baking powder, salt, coco powder, chocolate and nuts and mix again.
3. Grease muffin pan with little butter and spoon cookie mixture into it and press it in so it creates a cup.
4. Bake for 10-13min until firm. Let cool for 15 min in the pan and remove them by gently twisting them with your fingers. Let cool completely.
5. In the bowl combine agave nectar and softened butter. Slowly add powdered sugar and mix until incorporated. Remove about 1/3 of cream and dye with yellow food colouring.
6. Pour white cream into the cookie cups. Finish off with small of yellow cream.

Happy Easter :)

Sunday 1 April 2012

"Little Paris Kitchen": the breakfast treats

"Little Paris Kitchen" is the new program on tee-vee that made me to forget my beloved "Desperate Housewives". And it's not that there is anything to compare between them two! I used to be really devoted to watching a little of Wisteria Lane mysteries, but now I am just dazzled by this grand appearance of Rachel Khoo and her wonderfully looking food, style sense and her little kitchen. I love her lifestyle so much... in fact I even feel a little bit jealous.

Even though there have been only two series, I have managed to try some of "Little Paris Kitchen" recipes myself: two breakfast treats! First I tried Croque Madame muffins as seeing it how it was created really inspired me!
Then I made these Eggs in pots (oeufs en cocotte)...
And I can say that I finally found something better for breakfast than Eggs Benedict.... and it is easier to make! Except I used bacon instead of lumpfish roe since is really difficult to find it in UK. Here is the recipe.

EGGS IN POTS

Ingrediants:    150g creme fraiche
                       salt and freshly ground black pepper
                       pinch nutmeg
                       handful of chopped dill
                       4eggs
                       1 rasher of bacon
  1. Preheat the oven to 180C
  2. Season the creme fraiche with salt, freshly ground pepper and a pinch of nutmeg.
  3. Place a heaped tablespoon of creme fraiche in the bottom of a ramekin, followed by a little dill.
  4. Crack an egg on top, add a second tablespoon of creme fraiche and sprinkle with a pinch each of salt, pepper and nutmeg. Add small tear of bacon on top. Repeat all this with three more ramekins.
  5. Place the ramekins in a baking dish and pour enough lukewarm water into the dish to come halfway up the sides of the ramekins.
  6. Bake for 15 minutes or until the egg yolks are set to your liking.
  7. Finish each serving with some dill.

Friday 30 March 2012

My French pastry baking class


I know we are coming to the end of the week, but guess what I did last weekend! You obviously thinking: "of course it is going to be a French pastry course, since you have written that on the title"! Yes yes... that is exactly what I did and it's because I wanted to face my fear and finally be able to bake all these complicated pastries (especially puff pastry since it is more time consuming than I thought). Our tutor Pino Ficara taught us to bake Praline Mille Feuille (Napaleon Pastry)...

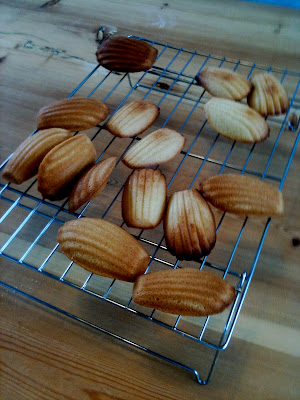
...Chocolate Eclair, Madeleine...

... and Creme Brulle....hmmm!
 I was particularly happy to see savory option there as after all this sweet I felt a little too overwhelmed (I had cake before the class - really bad idea). Here it comes....
 
"PISSALADIERE" OR SAVORY PASTRY TART

Ingredients: 250g puff pastry
                    1 onion, thinly sliced
                    1 courgette, quartered and sliced
                    1 aubergine, quartered and sliced
                    1 red pepper,  cut into julienne
                    oil, butter, salt, sugar, pepper

1. Pre-cook vegetables: in deep pot over low heat add butter and olive oil, add onions, pinch of salt and about 1 tablespoon of sugar. Let onion cook gently without coloration, remove onto tray lined with foil and let cool.
2. In a oven tray add enough oil to barely cover bottom and over medium heat cook all the vegetables separately until tender. let it cool.
3. Preheat the oven at 200C. Roll puff pastry into square, place on the tray lined with baking paper and with a fork prick dough well to prevent it from puffing too high when cooking.
4. Place cooled onion onto ready pastry,
     then arrange the other cooked vegetables.
Brush the sides with the egg yolk for the glaze...
 
Bake immediately until golden, let cool a few minutes before slicing and serving.

If you would like to attend the french pastry class yourself like me, go to  http://www.bakewithmaria.com/courses/

Friday 23 March 2012

The story about how the spinach pretended to be a sorrel


Last week I finally made the trip to my garden in London. Oh... how I love spring! I was actually expecting to face the worst: weeds and my neighbor's blackberries invading my garden. But instead I was delighted to see the sorrel and the rhubarb all recovered after long winter we had! I know you all know well about the rhubarb, but I really want to highlight how amazing is the sorrel. Well... this leaf vegetable taste crispy sour when raw and makes my childhood's favorite soup soooo yummy! I know it is not common to grow in England although it grows better in my garden then in Lithuanian climate. Never mind that.... my mum came up with this sour spinach recipe that matches my so loved sorrel soup... and she did not come up with that for me (since I am in England and can't buy sorrel in the shops). My mum's major goal was to get my little brother (age 10) to eat more spinach (sorrel soup was also his favorite). Let me tell you more about my little brother. He is like a most children don't like vegetables or anything green food related (except sorrel of course) and likes pizza, fries or cola. So you can imagine my mum's frustration to feed him with the healthy foods. That is how she comes up with sour spinach soup to imitate the sorrel soup... GENIUS!!!


SOUR SPINACH SOUP
Ingredients: 1 onion
                    5 rashers of smoked bacon
                    2 carrots
                    1l chicken or vegetable stock
                    2 potatoes
                    200g fresh spinach leaves 

                    2 eggs
                    juice of half a lemon
                    salt and pepper to taste


1. Fry onions, cubed smoked bacon and shredded carrot.
2. Add stock and diced potato. Bring it to boil and simmer it for 20 min.
3. Reduce the heat and add the spinach and cook for about 2-3min

4. Remove it from the cooker and stir in whisked eggs and lemon juice. season it to taste.

I hope you like it!             

Sunday 18 March 2012

The ways you can distract yourself from overeating...

 I am known for overeating and even when I am full I can still fit the whole cake into my mouth (literally). So no wonder after Christmas (which obviously long time gone) I have put on sooooo much weight! I felt so discouraged as I could not fit into any of my jeans (except boyfriend or loyal cut)... :(
Anyway, I am back to normal and this is only because I kept myself distracted by my second favorite activity after cooking and eating: knitting and crochet. I found that there are a lot of social groups going on in London doing different kinds of interesting things. But I was only interested in joining the knitting club. My friends think that this is where I meet my granny friends... ha ha. But, no no... I am not the youngest there, you will have to believe me on this. There was a girl last week aged around 10 years, really eager to learn!
So far I finished most of my knitting projects and I am on something new at this moment. I am crocheting a collar! You might think that I got the idea from my "granny" friends that I met in the knitting club, but that's not truth, I always liked this style (my friend Vicki call it "old-lady style"). I am not finished yet, but there you go....
 So far I have been crocheting circles and joining them together to fit the pattern.
Will defiantly update you when I finish it. Meanwhile if you are not the biggest fan of knitting or crocheting then this truffle recipe is for you! My friend Vicki thinks is the best thing you can eat as it contains all the vitamins you need like a vitamin bomb (she is a health freak). She says that whatever is healthy tastes the best... I normally disagree, but wow these are good!

DRIED FRUIT AND NUT TRUFFLES

Ingredients: 200g hazel nuts
                    200g walnuts
                    200g raisins
                    200g prunes
                    200g dry apricots
                    1tbsp honey
                    1tbsp lemon juice
                    sesame seeds or coco powder or chopped nuts or whatever to roll the truffles in

Just put all the ingredients into food processor, whiz for a minute, shape the balls out of mixture and roll it into coco powder or sesame seeds or what ever else suitable in that department.

Enjoy your healthy snacking!